How to Add Tenant Rental Information on Homz as a Property Manager
As a property manager, maintaining complete and accurate records is essential. With Homz, you can easily add rental information for each tenant, ensuring their lease details, rent amount, and other key data are well-organized and accessible at all times.
Follow the steps below to learn how to filter and sort tenant data with ease.
Step 1: If you have not already done so, “create an account on homz.ng” or “login” to your already existing account and you will be taken to your dashboard. See how to create an account as a property manager here.
Step 2: Access the Tenant’s Section
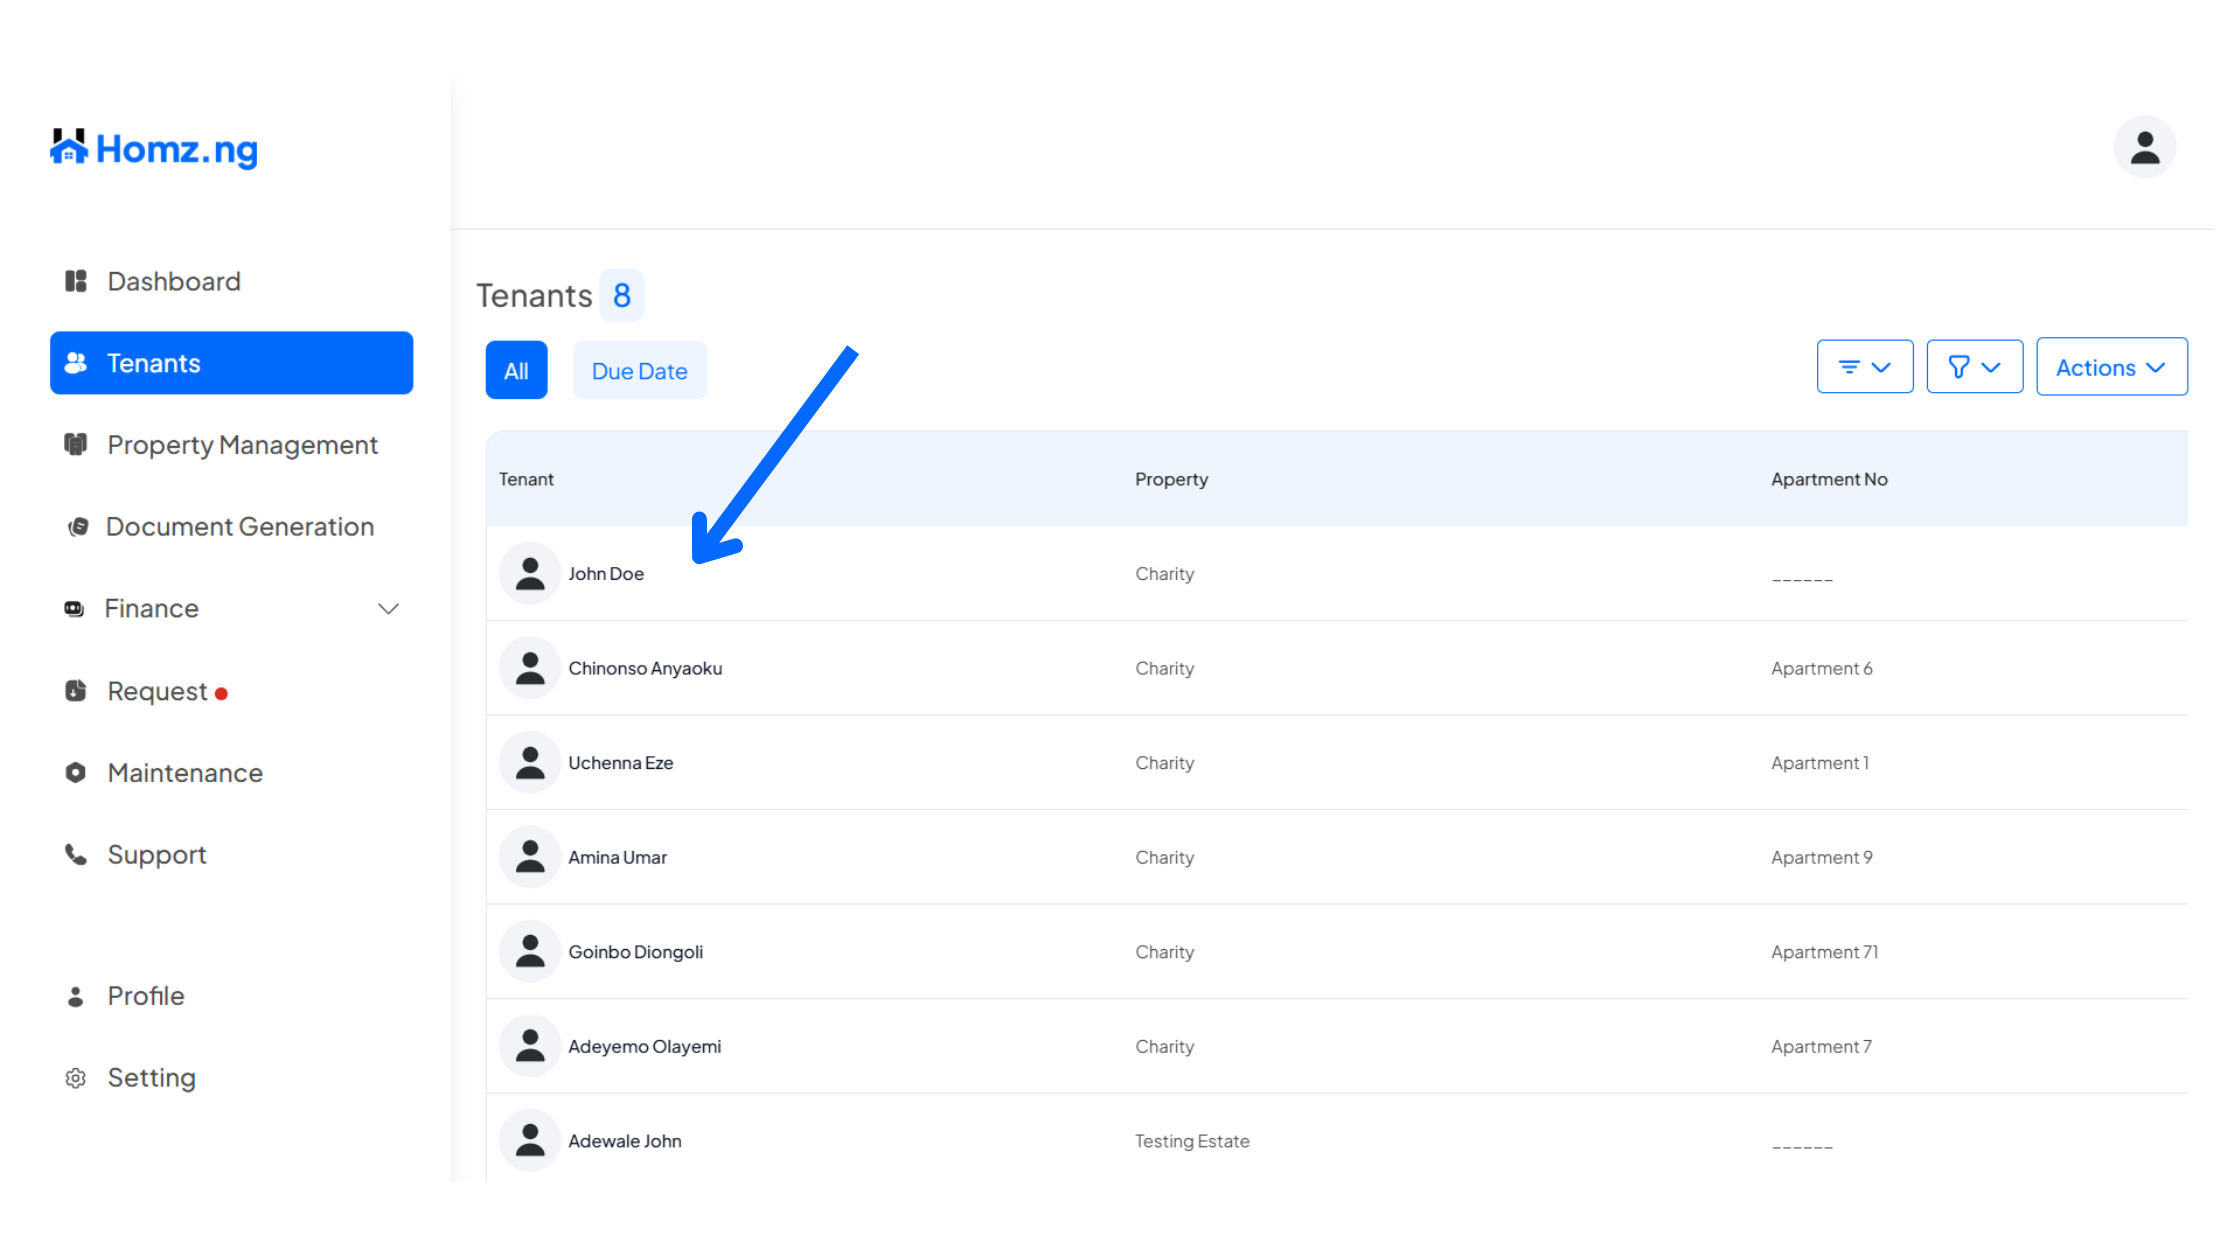
On the left-hand panel of your dashboard, click on the “Tenants” section. This will take you to the list of all your tenants.
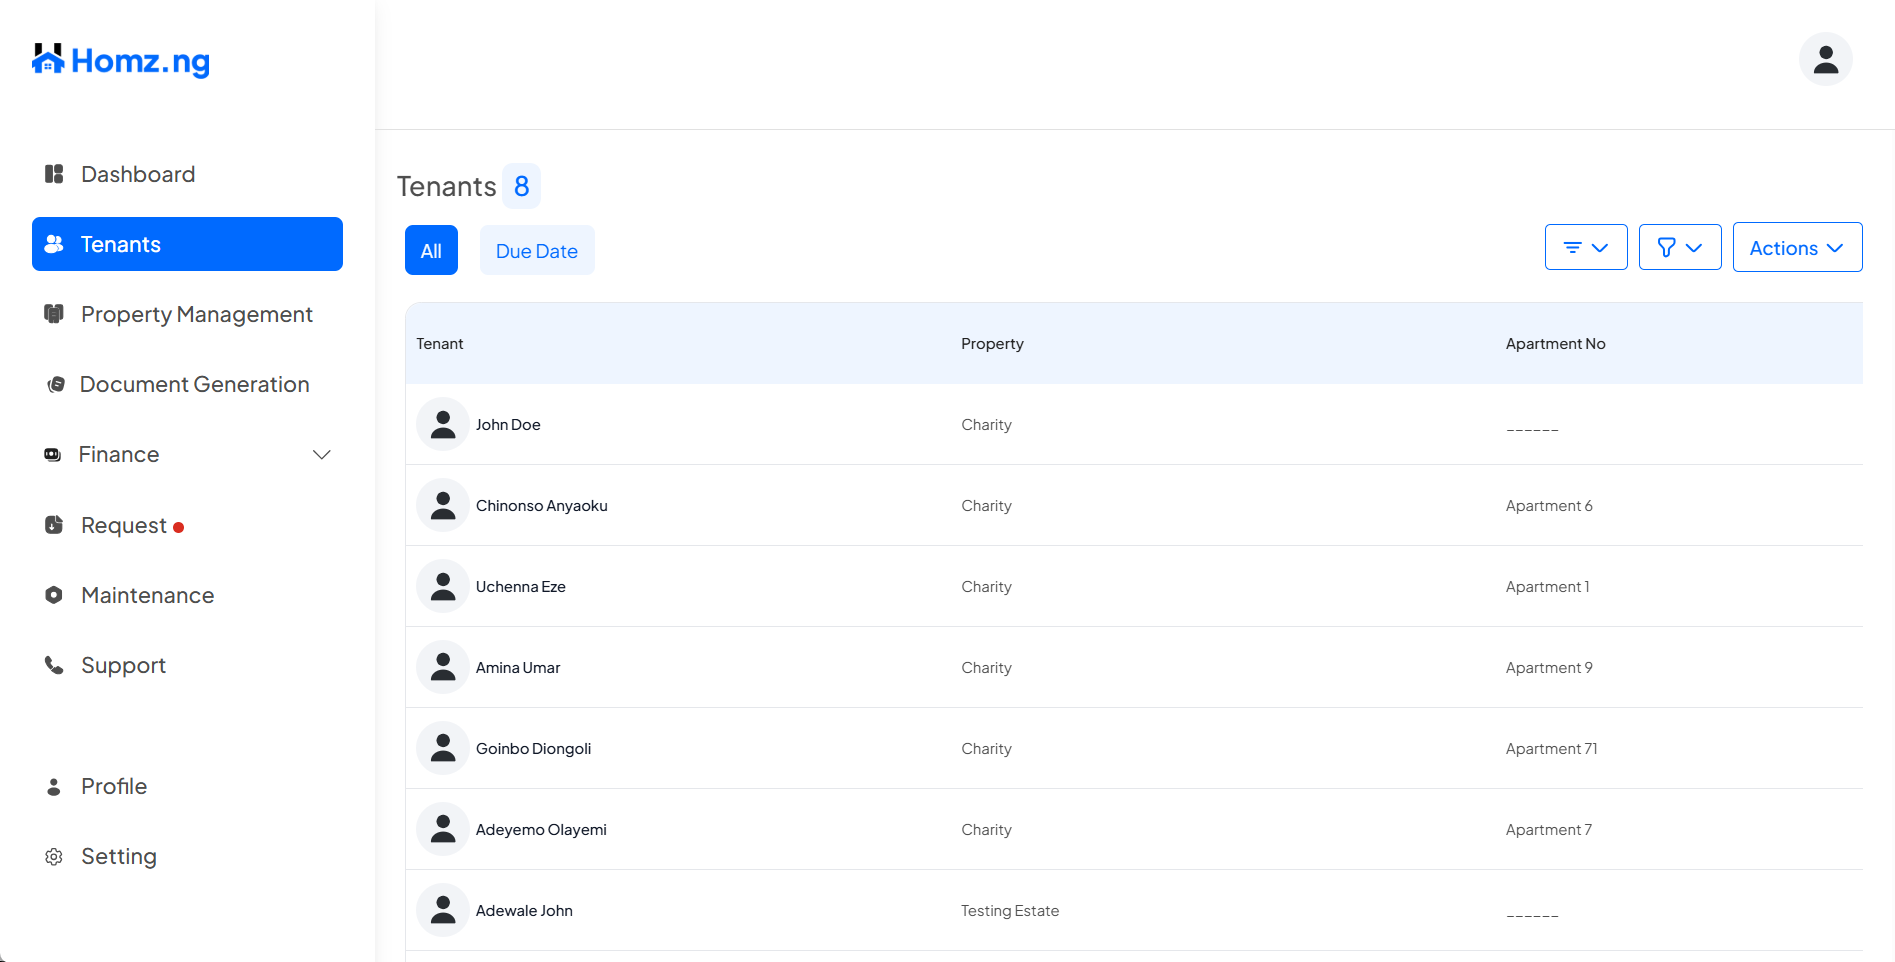
Step 3: Click on the tenant’s name to view the tenant’s profile
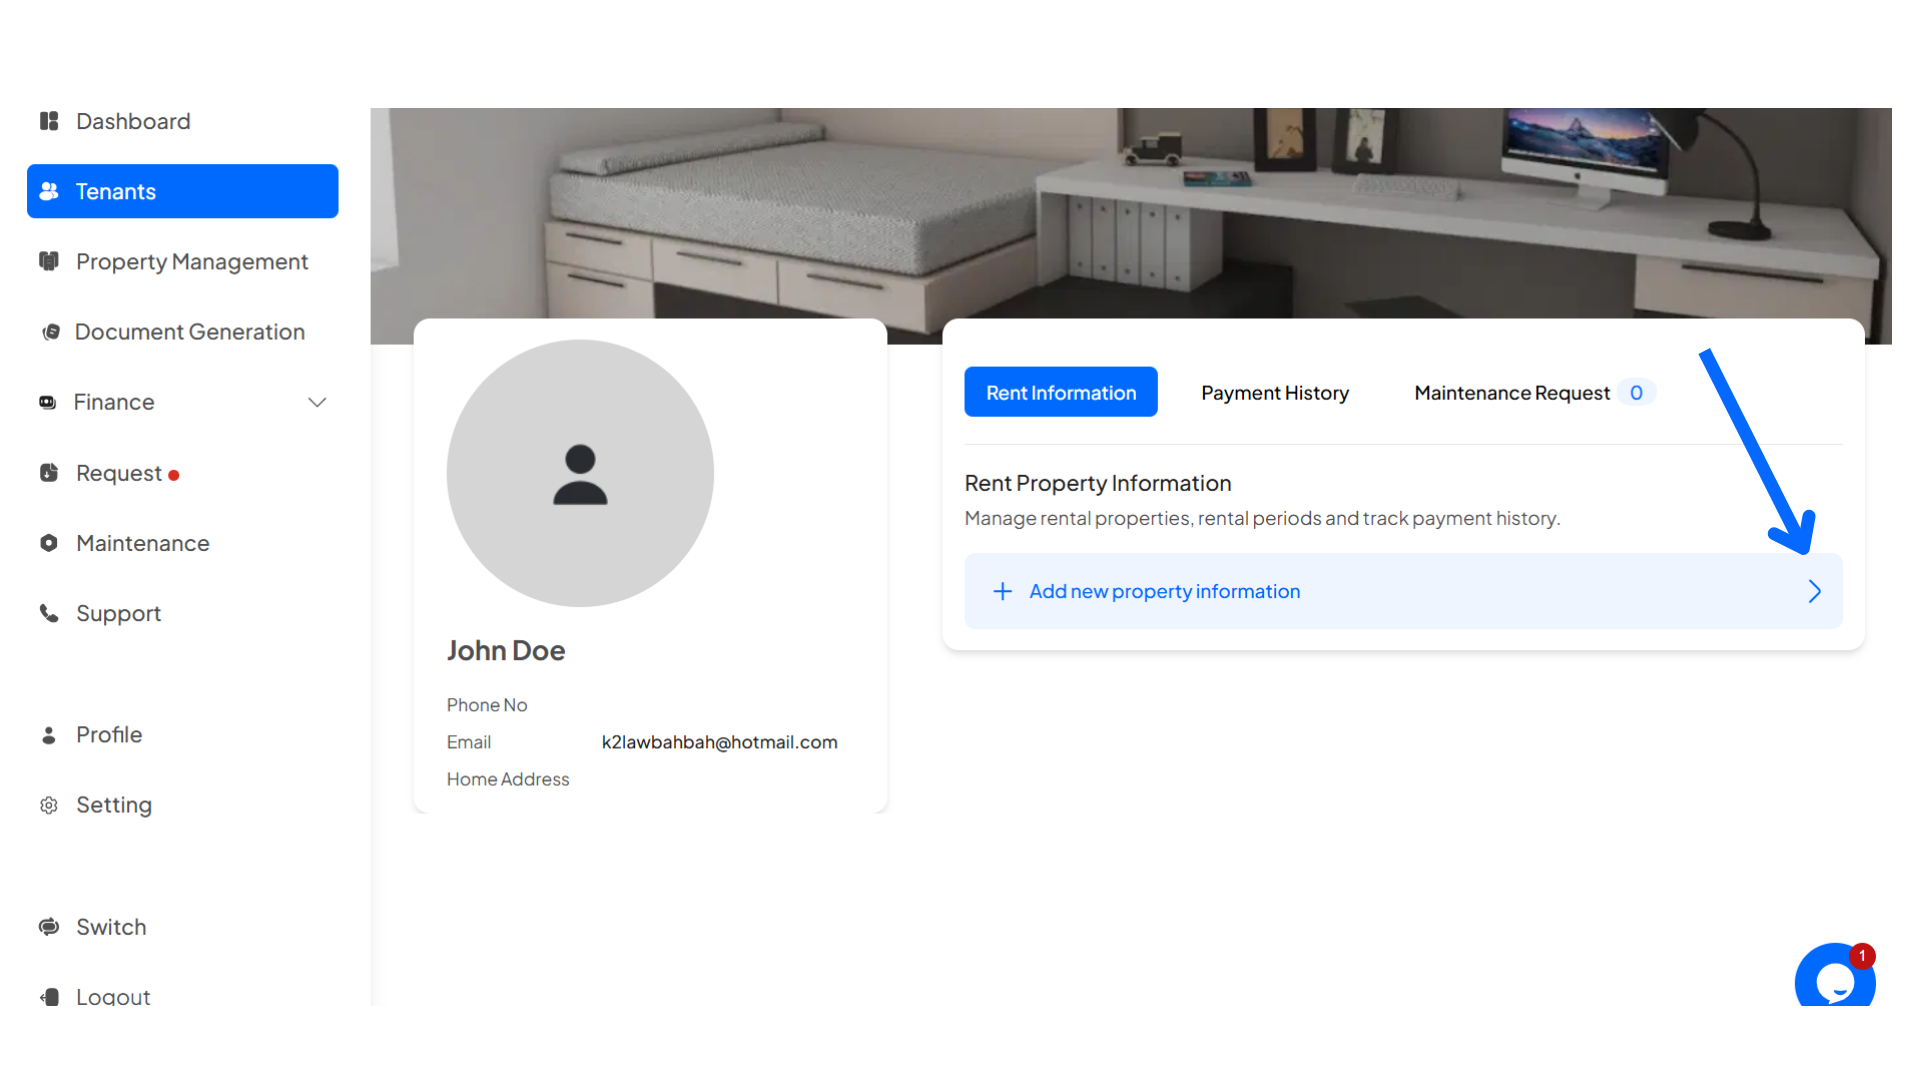
Step 4: Click on the arrow on “+ Add new property information”
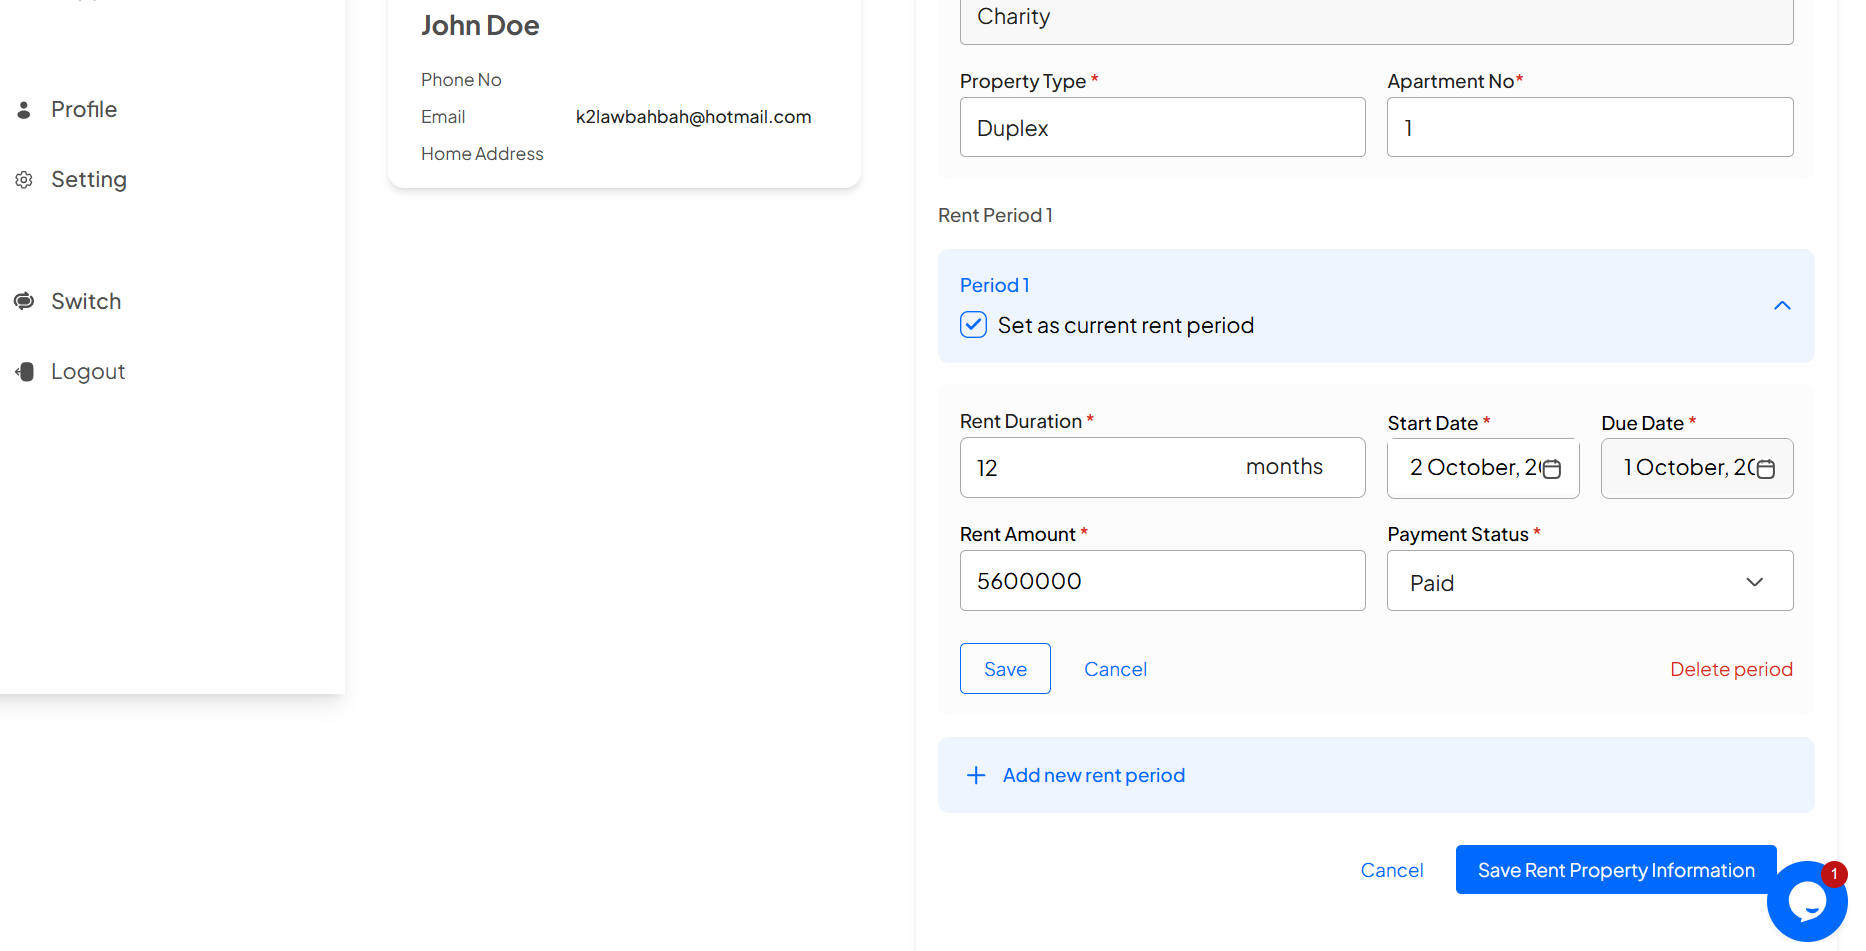
Step 5: Complete the rent information form, then click on “ Save Rent Property Information” to save
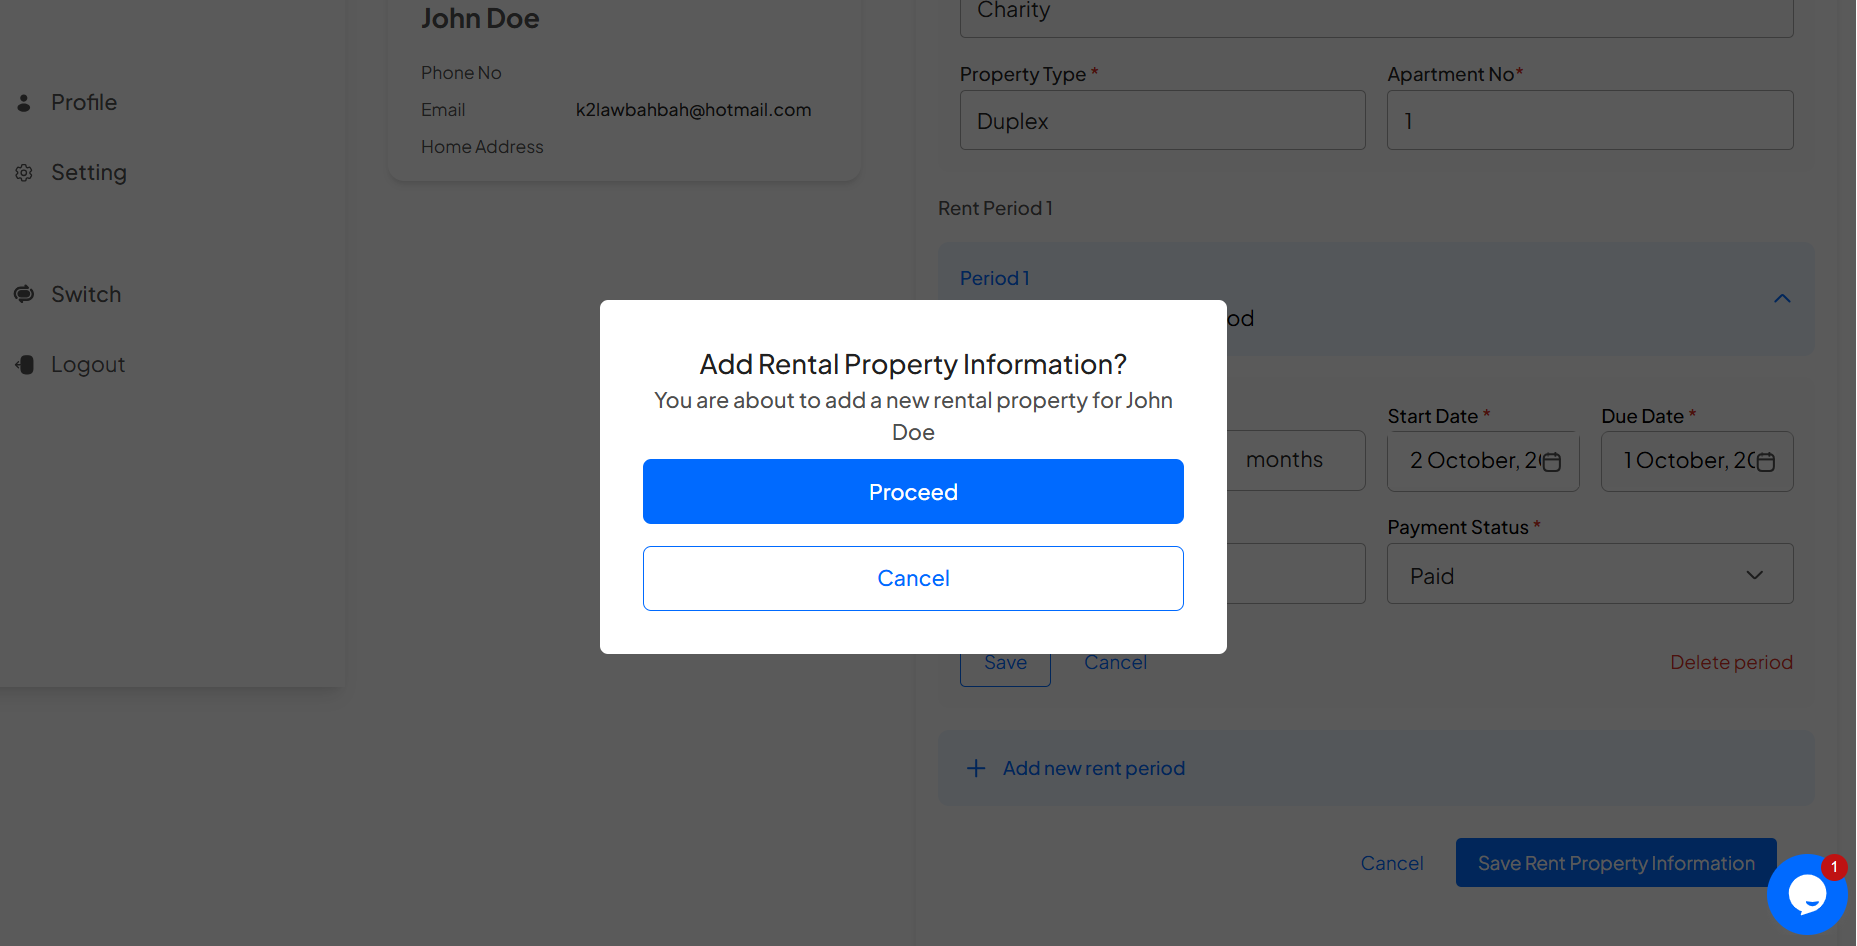
Click on “Proceed” to save or “Cancel” to cancel
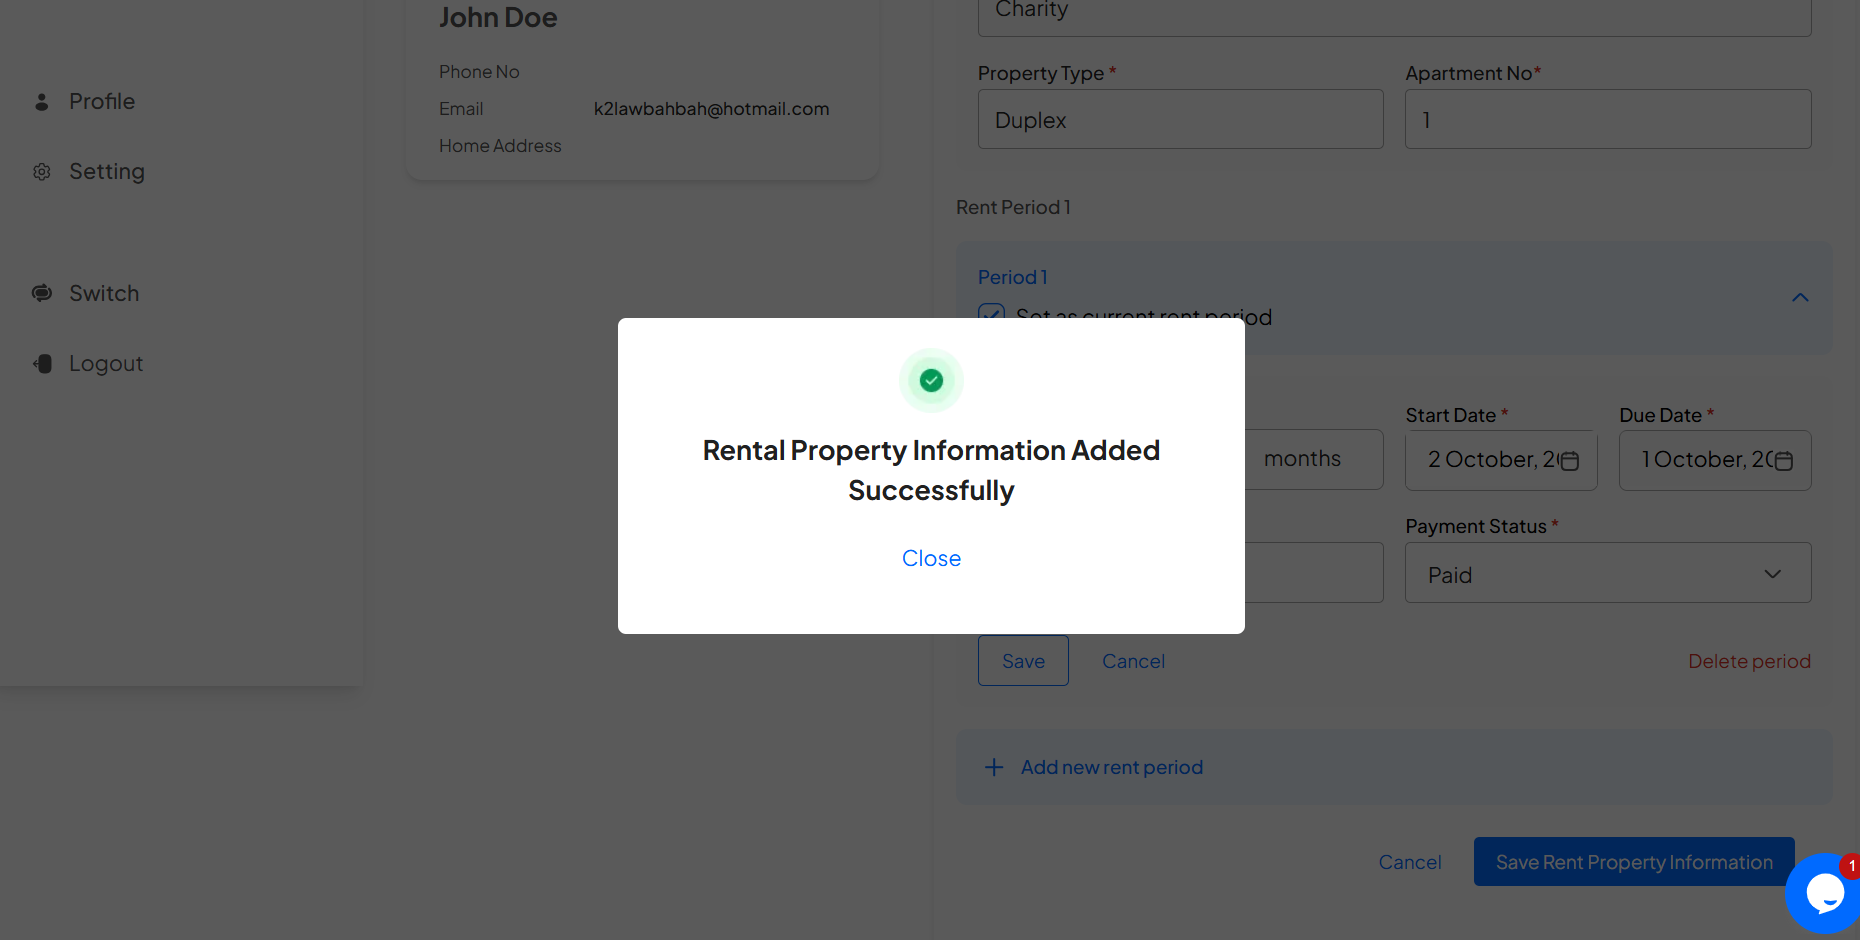
Step 6: Click on property name to view the rent information of the tenant
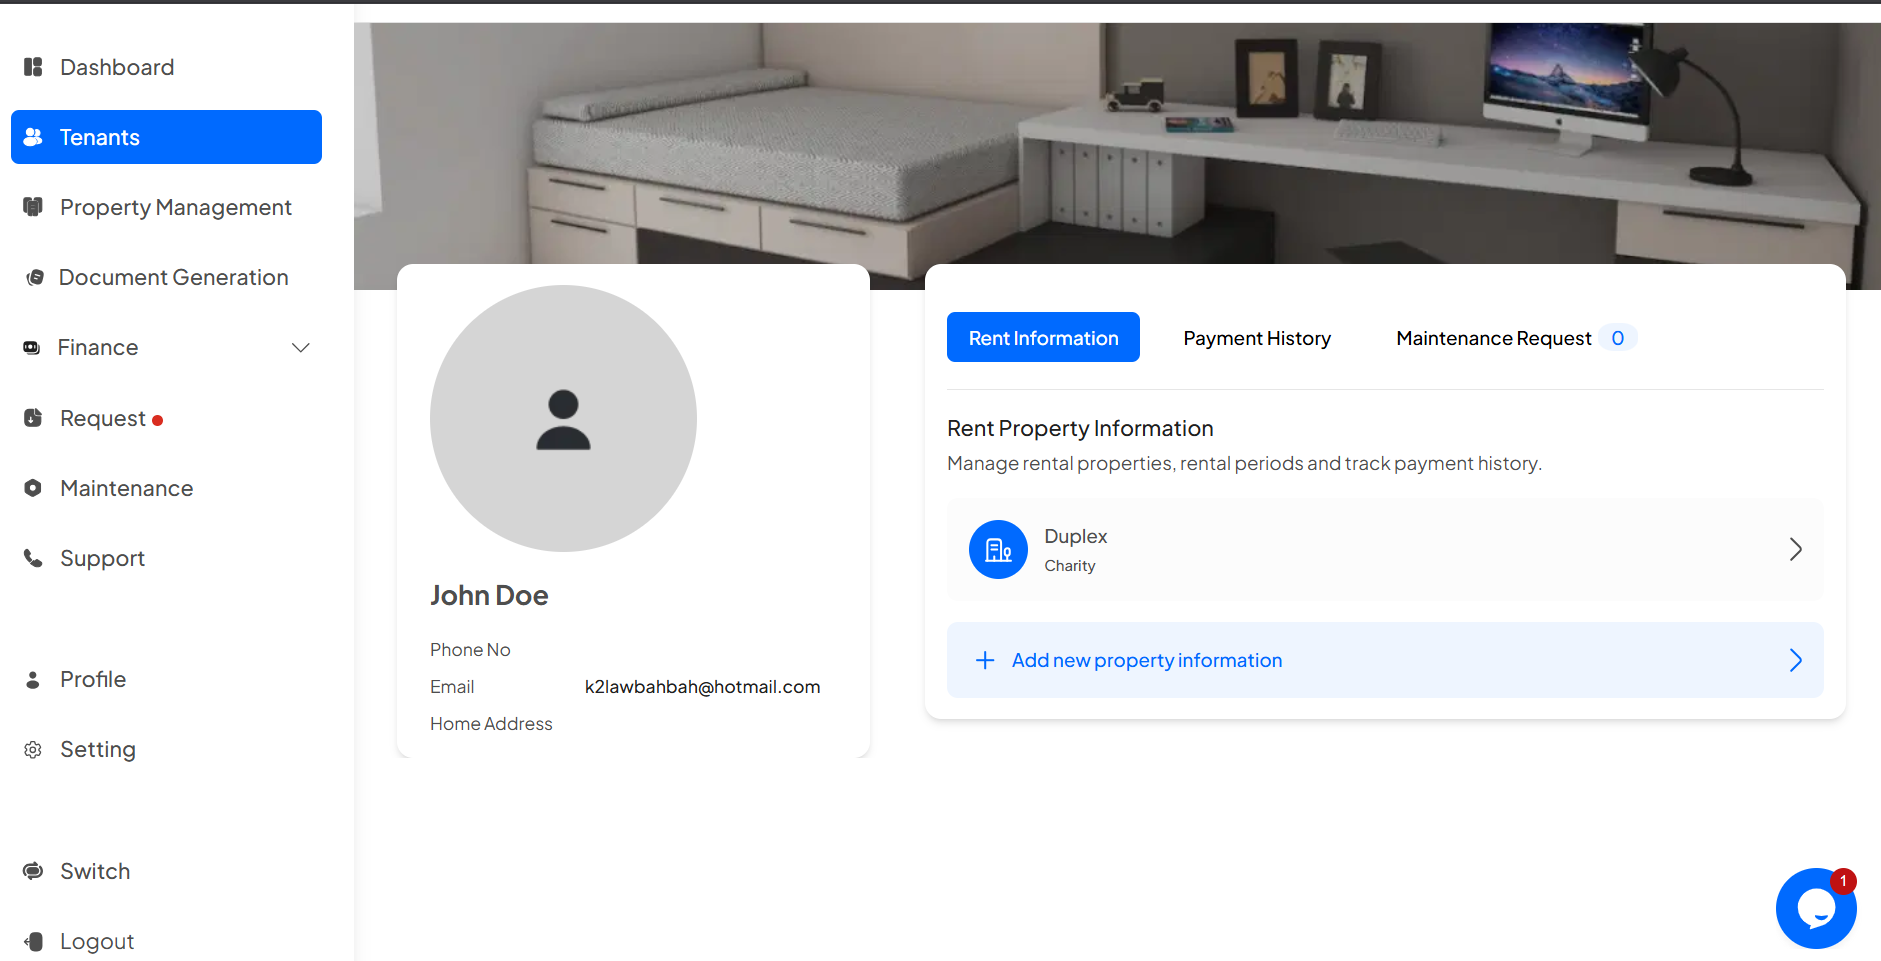
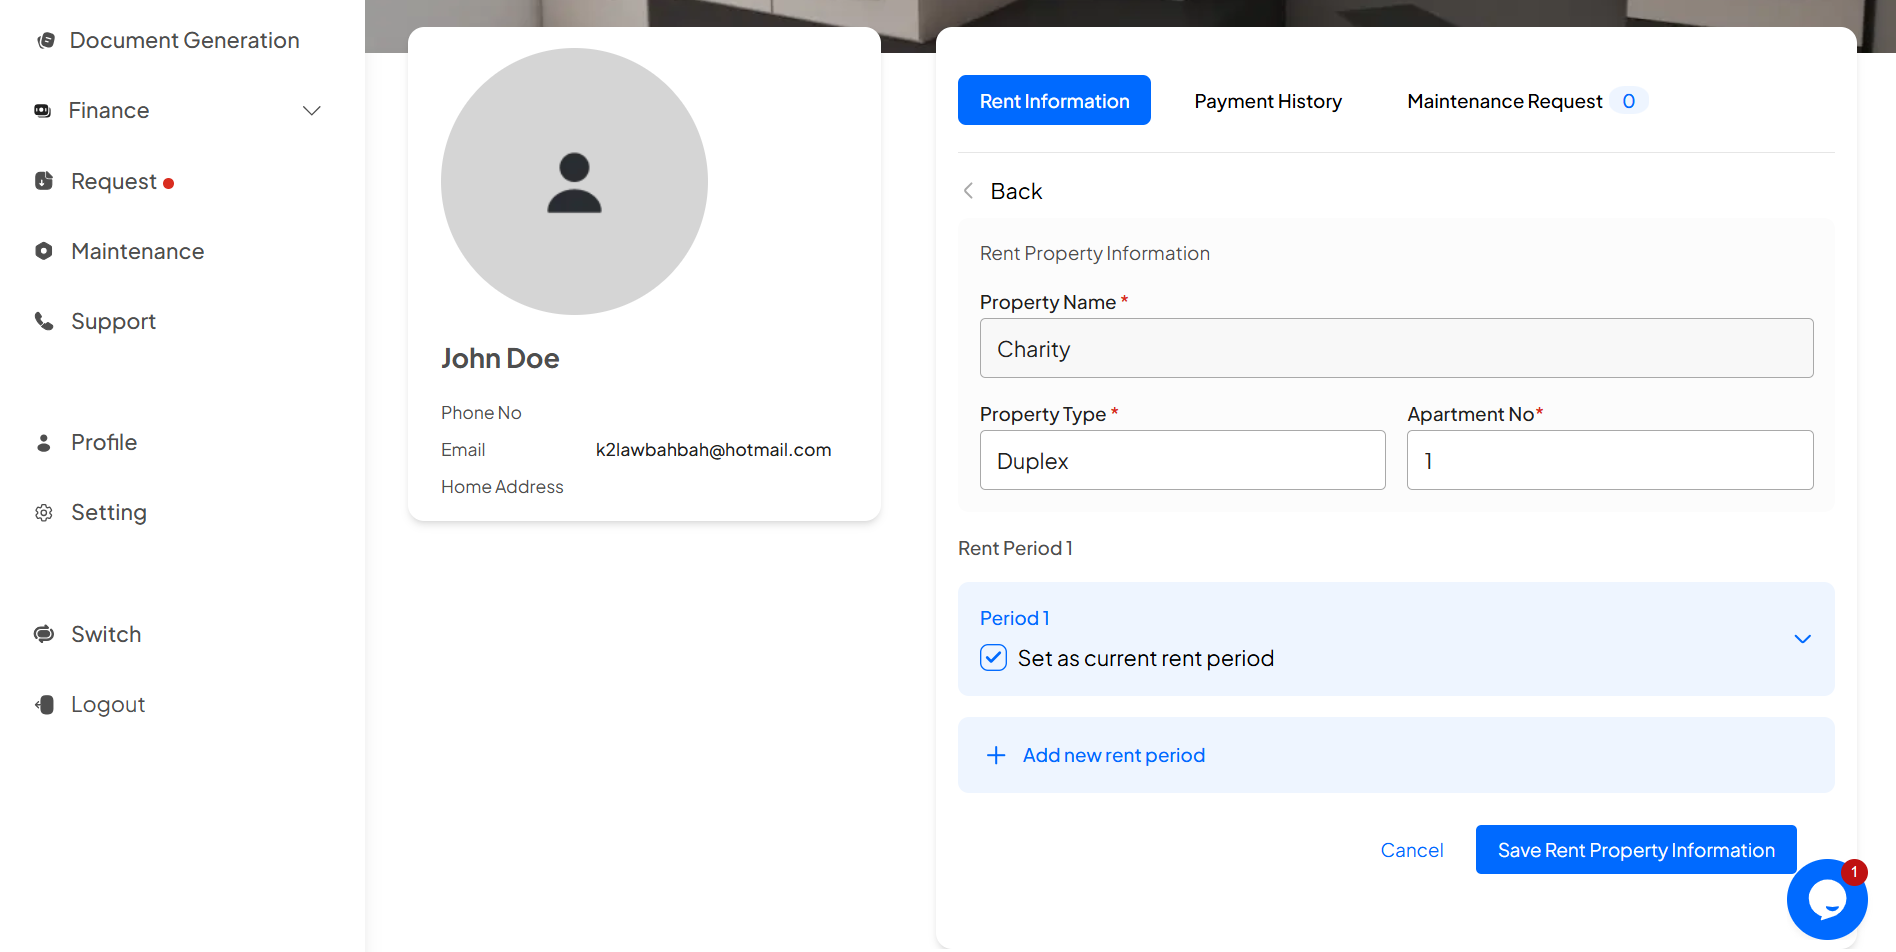
Congratulations, You have successfully added rent information for your tenant
Learn how to view your property metrics.
Learn how to view your tenants list.
