How to Manually Add a Bulk Tenants to your Property on Homz as a property manager
Effortlessly Add Multiple Tenants
Save time by adding multiple tenants to your property on Homz in one go. Enter tenant details in bulk, update records efficiently, and streamline your management process with ease.
Follow the steps below to learn how to add a single tenant manually effortlessly.
Step 1: If you have not already done so, “create an account on homz.ng” or “login” to your already existing account and you will be taken to your dashboard. See how to create an account as a property manager here.
Step 2. Navigate to the property management section by clicking on property management on the side-bar menu
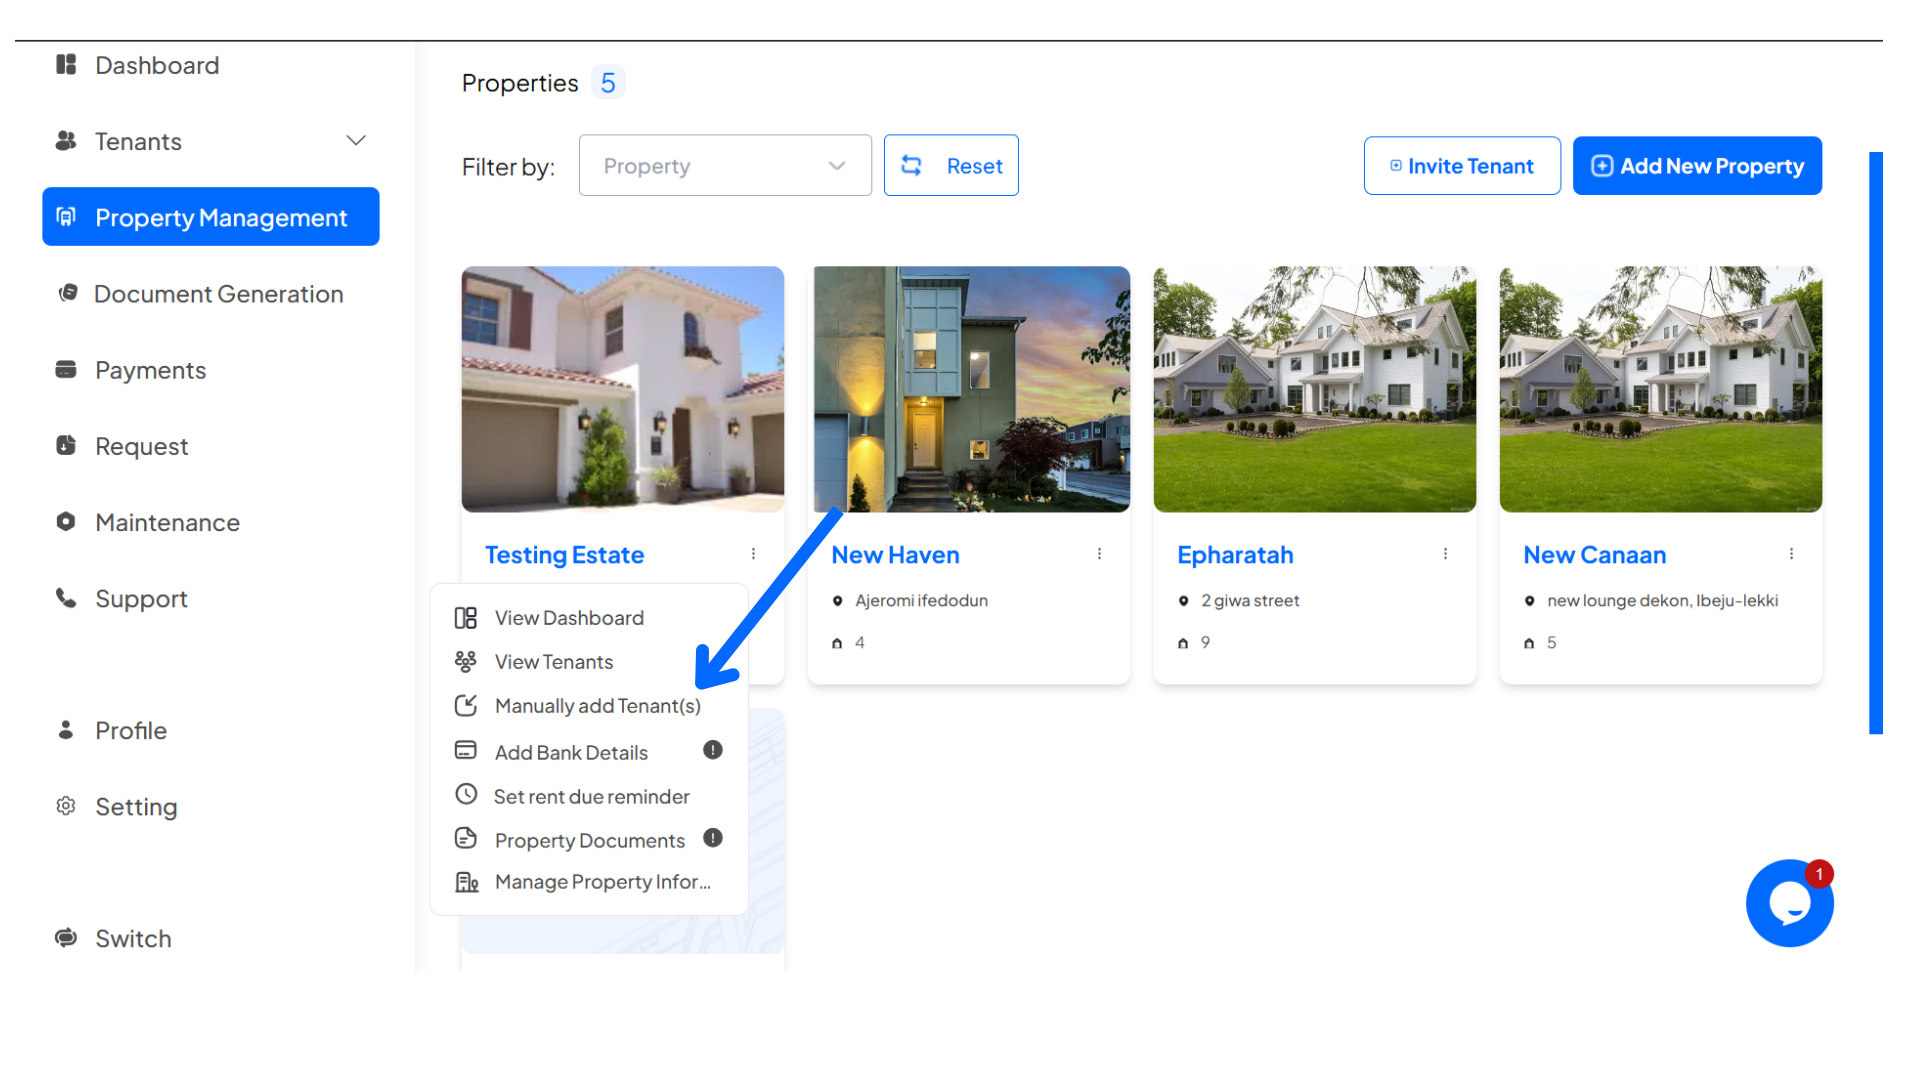
Step 3: Click : to view the property menus from your dashboard.
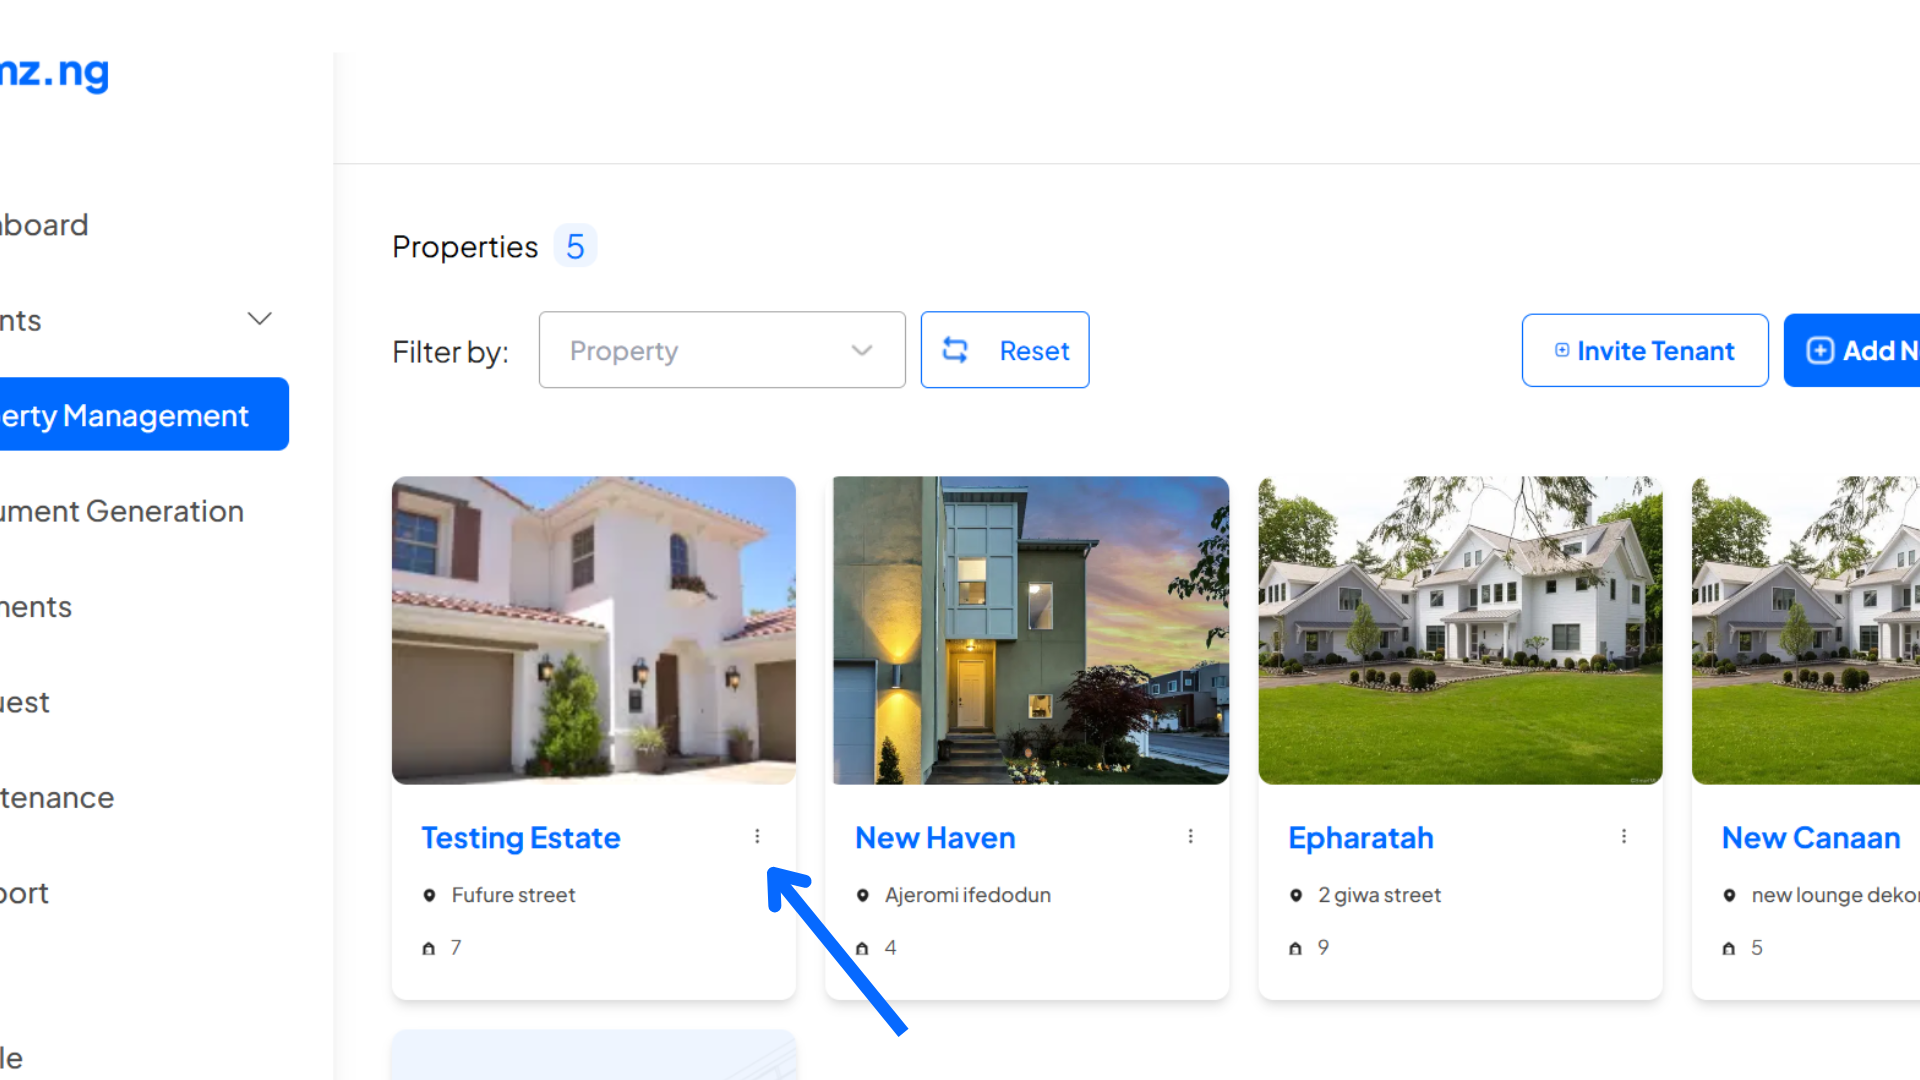
Step 4: Click on the “Manually add Tenant(s)” from the pop-up menu.
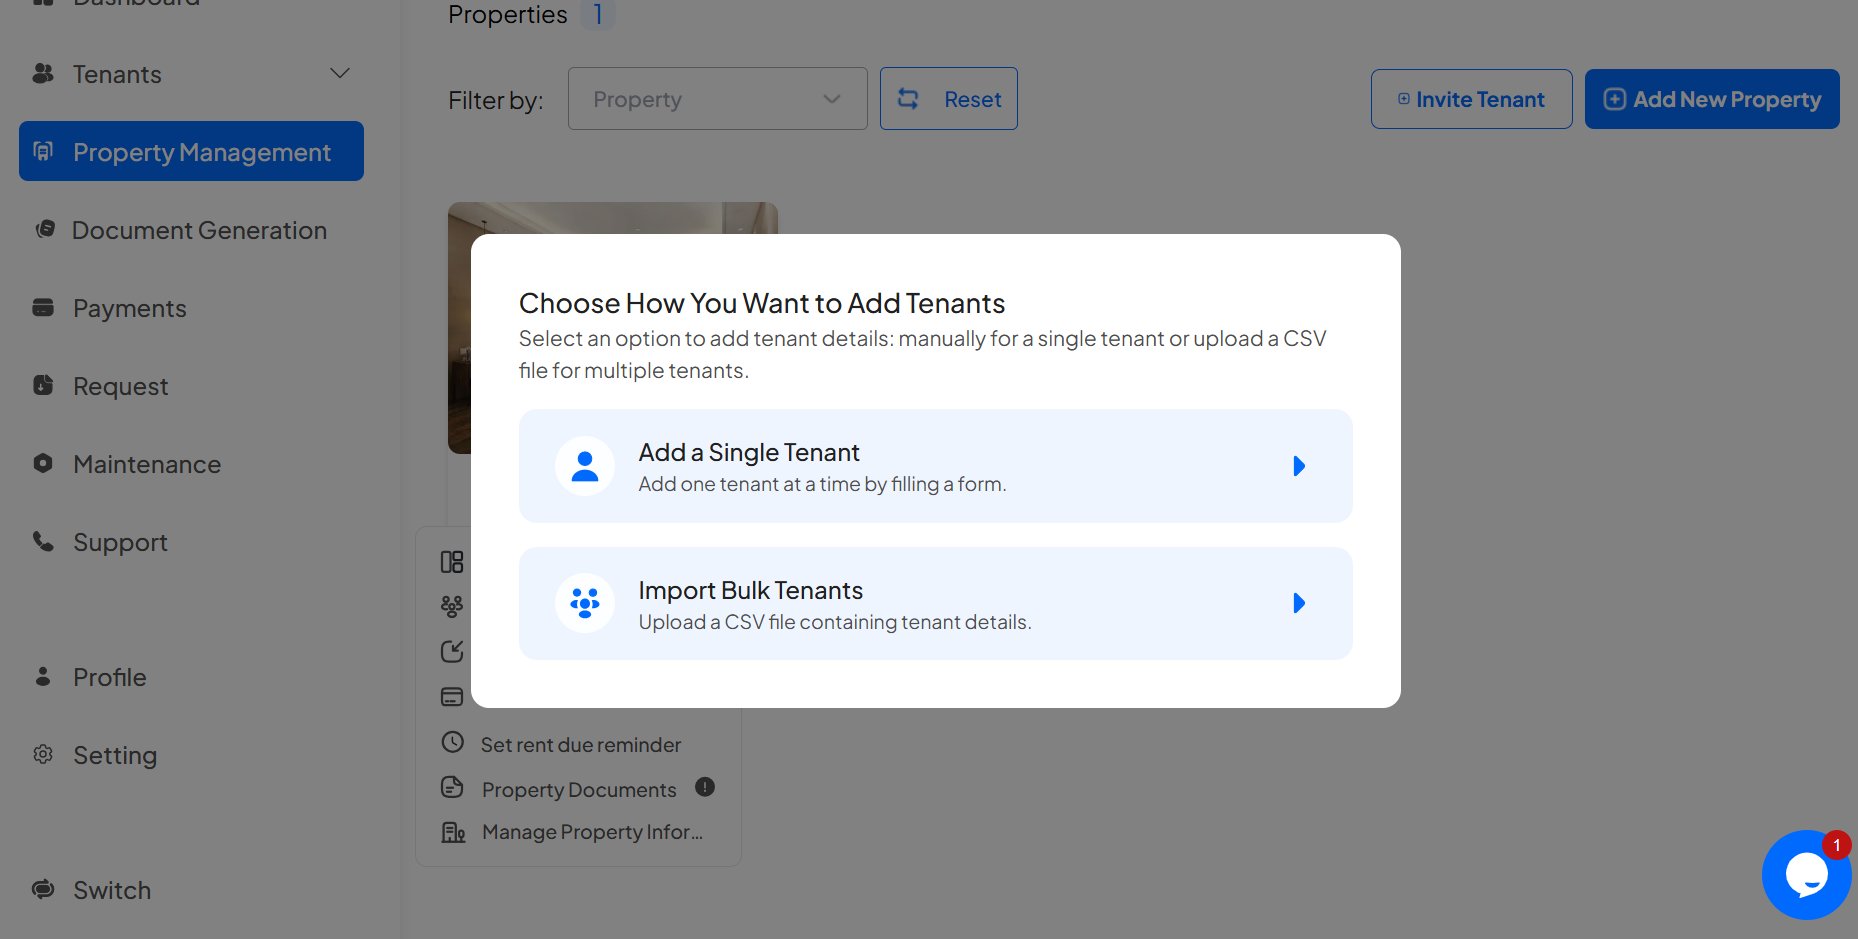
Step 5: Click on the “Import Bulk Tenants” from the pop-up menu.
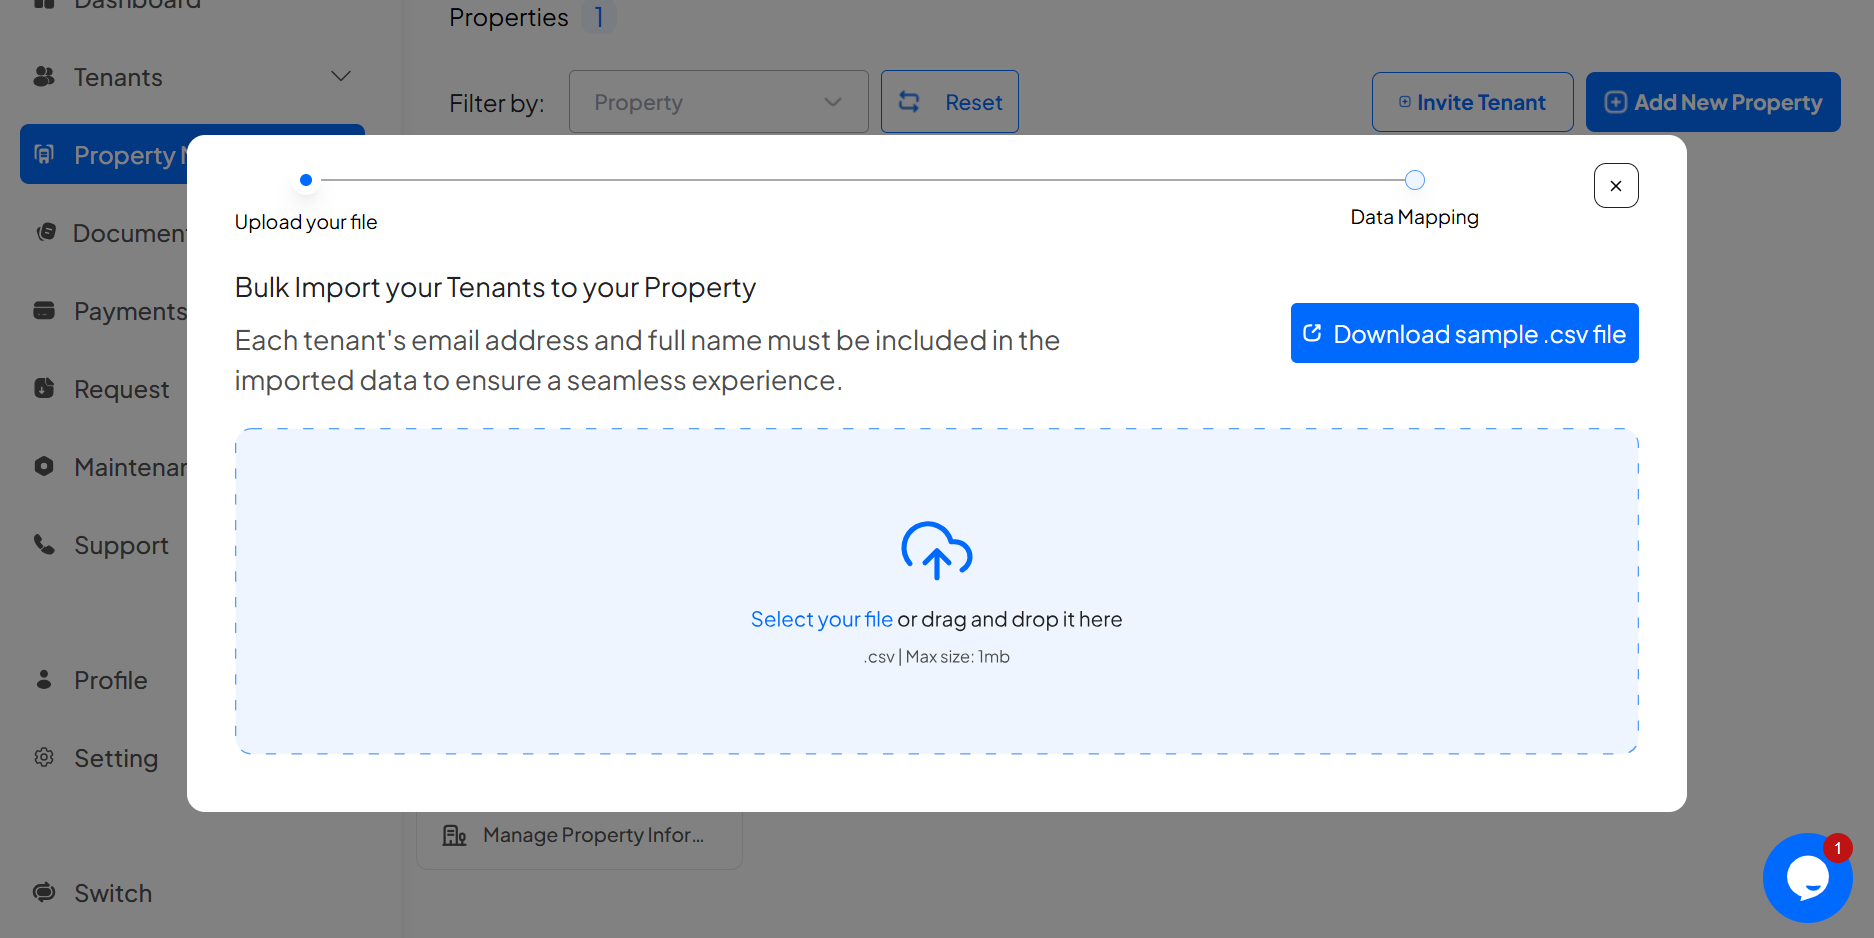
Step 5: Click on “Select your file” to import file.
(Note: You can click on “Download sample.csv file” to download the sample for the file)
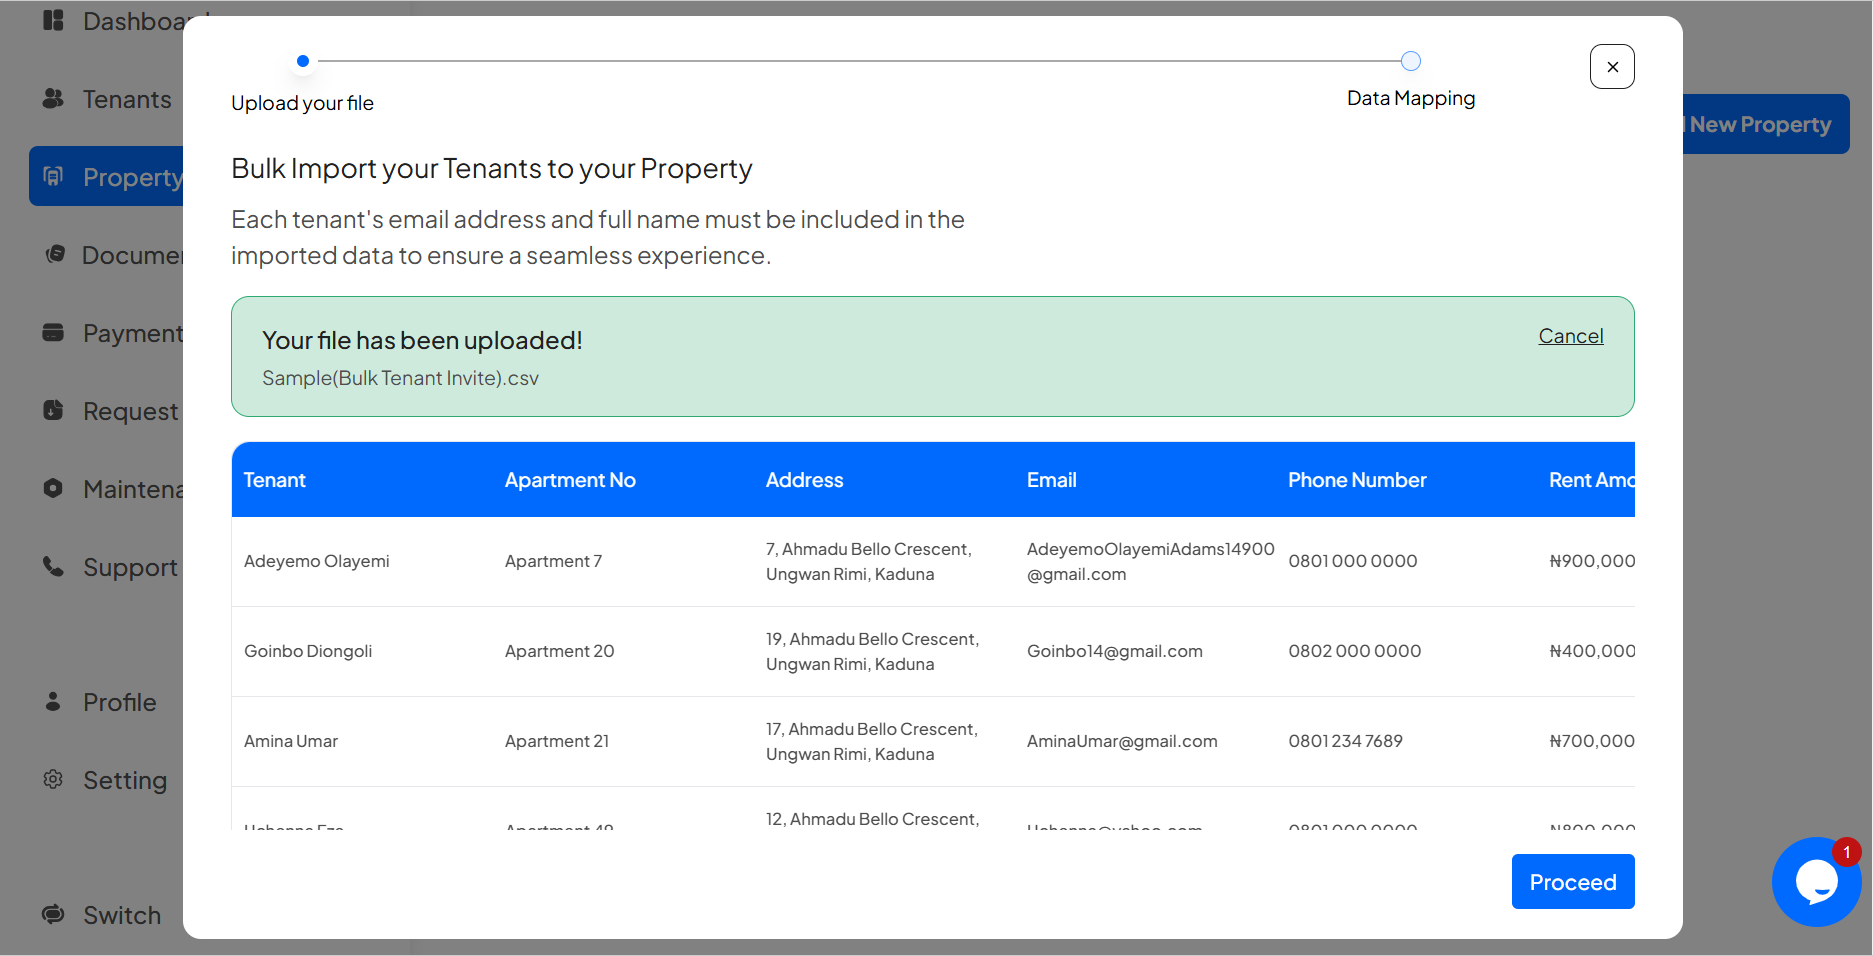
Step6: After you have selected your file, click on “Proceed” to start mapping the imported data
Step 7: Click on “Select attribute” to start mapping the data according to the attributes name in the dropdown menu.

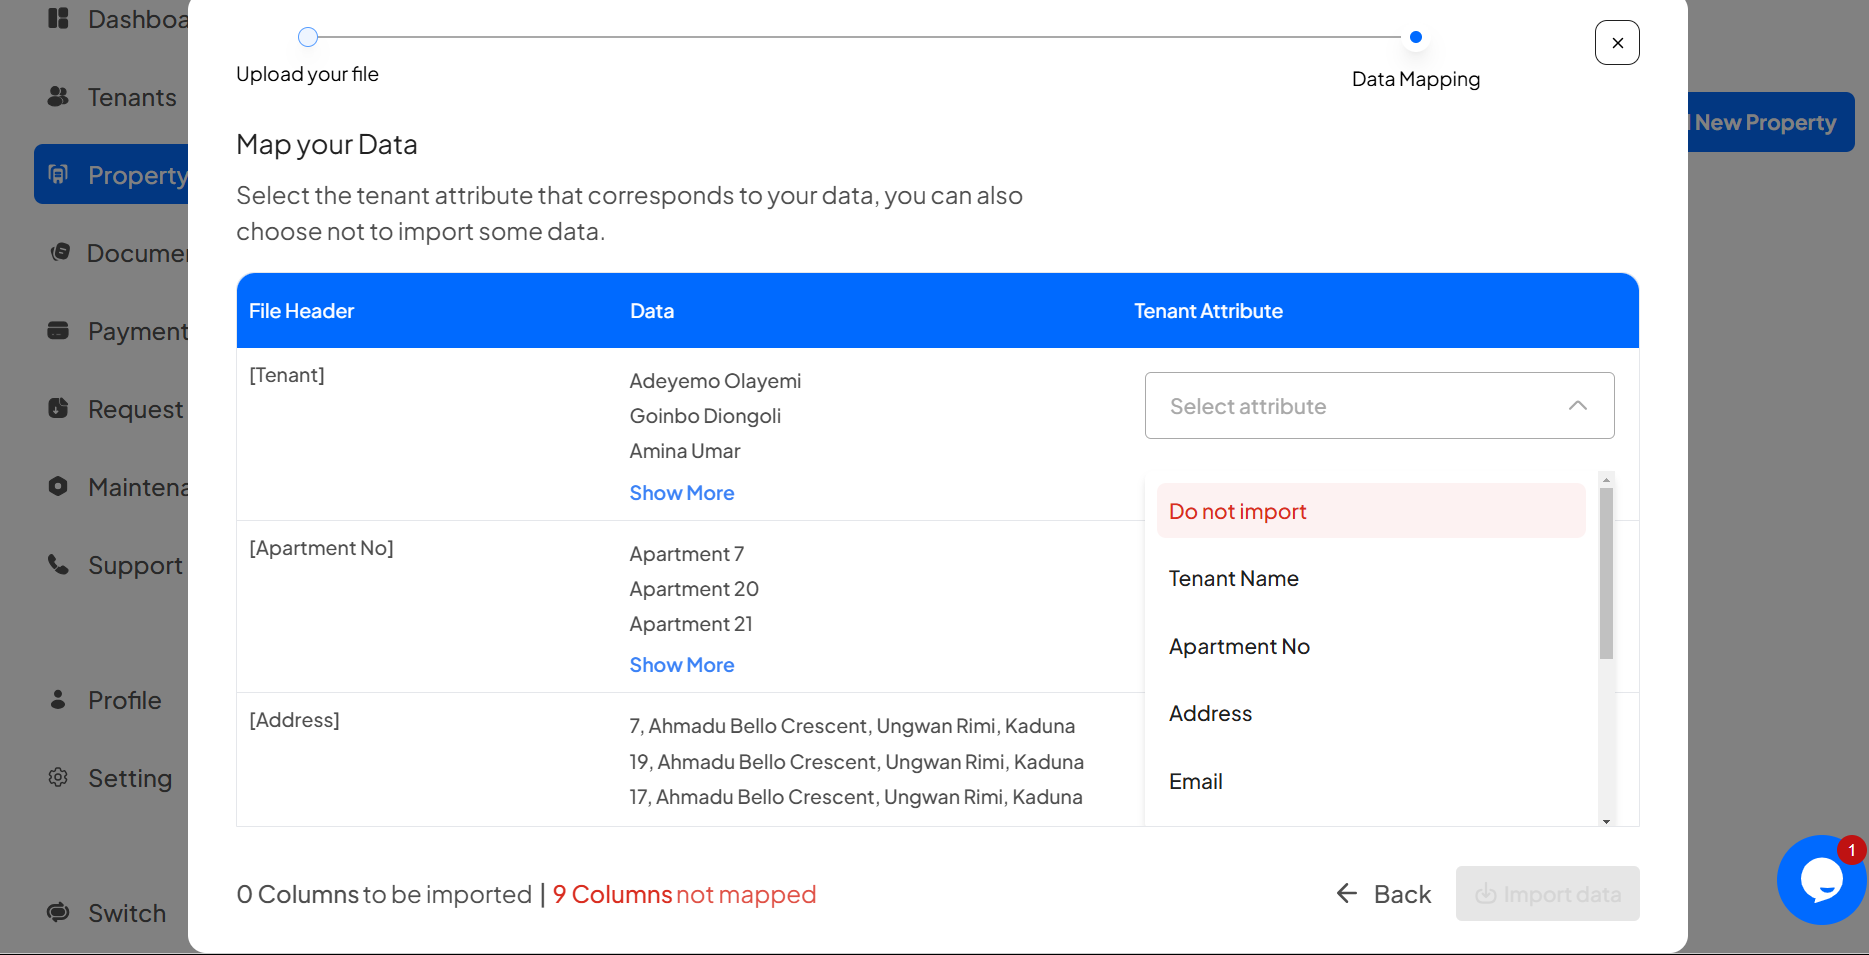
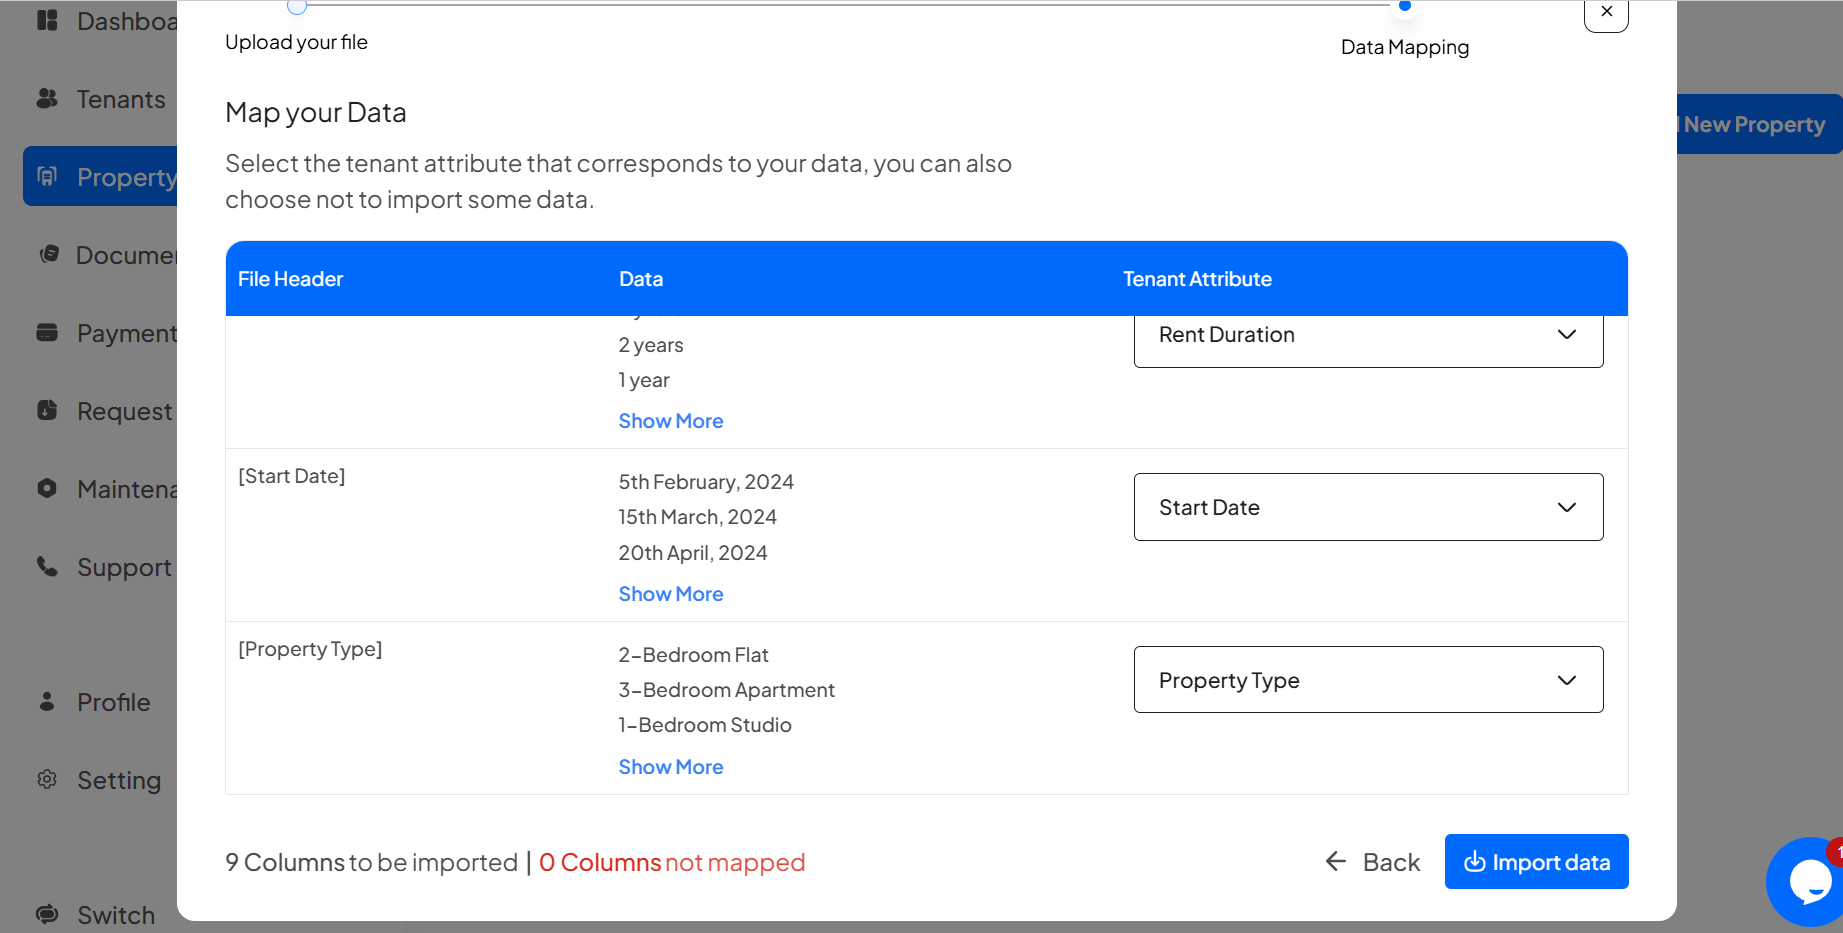
Then click on “Import data” to import your tenants
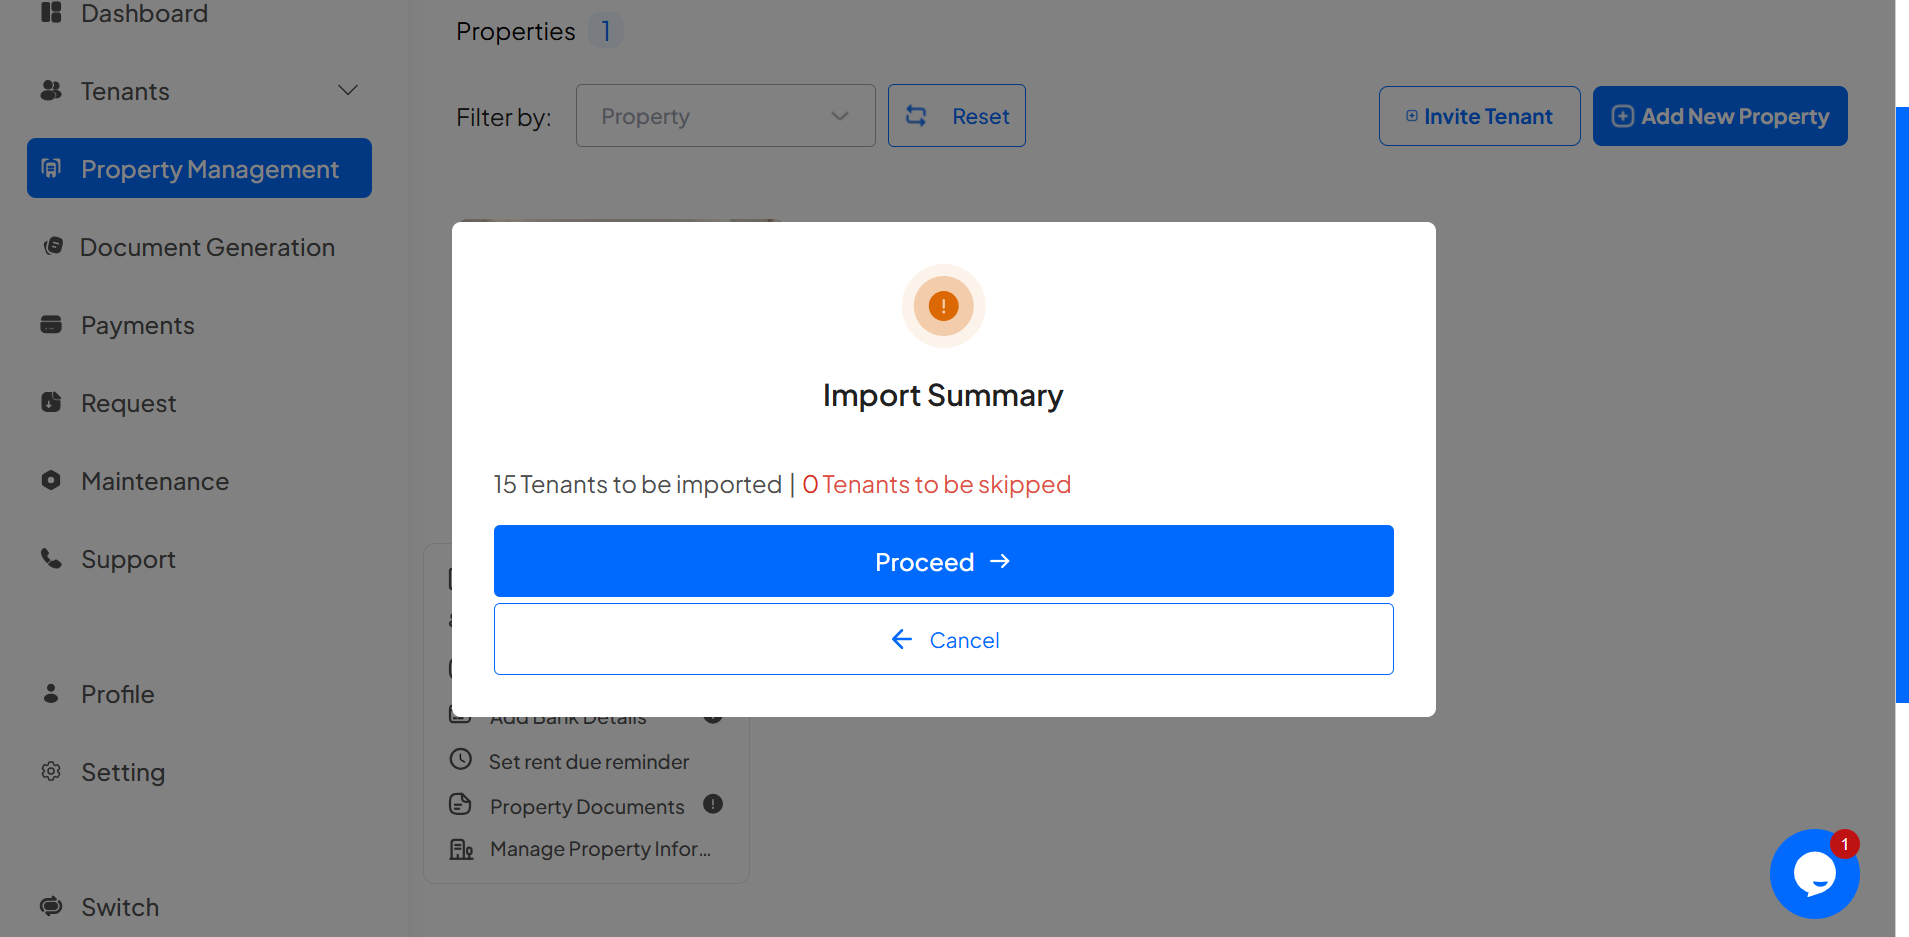
Click “Proceed” to import or “Cancel” to go back
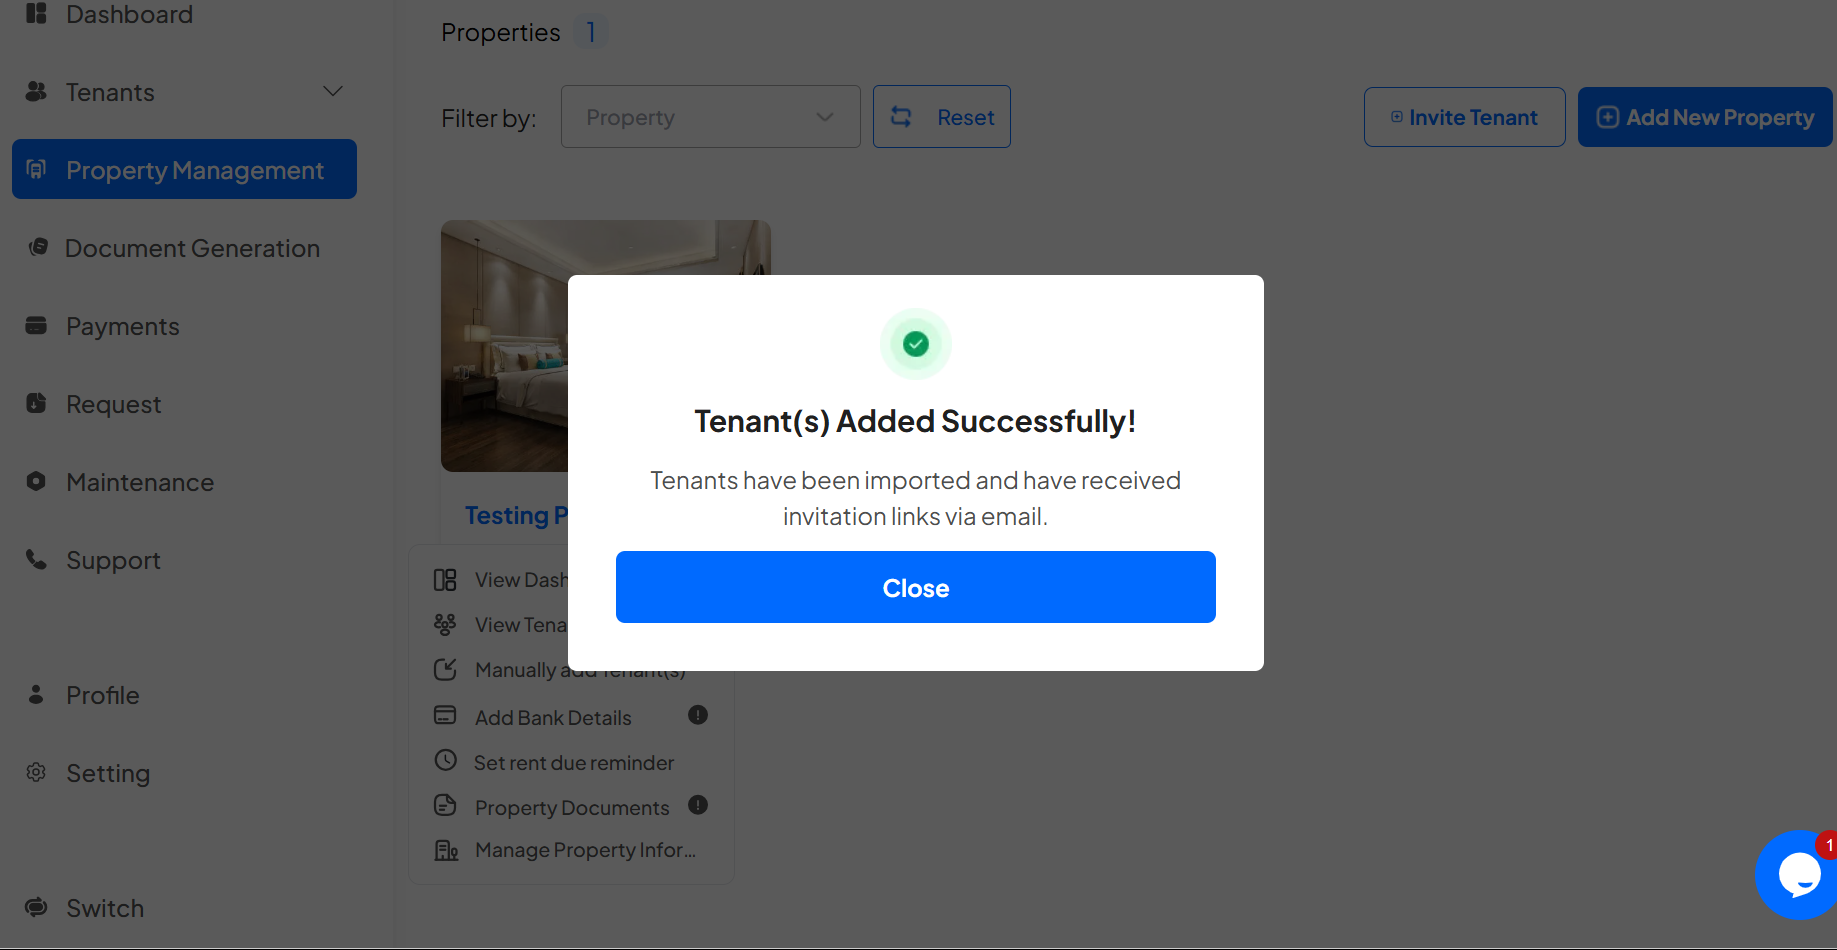
Step 8: On the left-hand panel of your dashboard, click on the “Tenants” section. This will take you to the list of all your tenants.
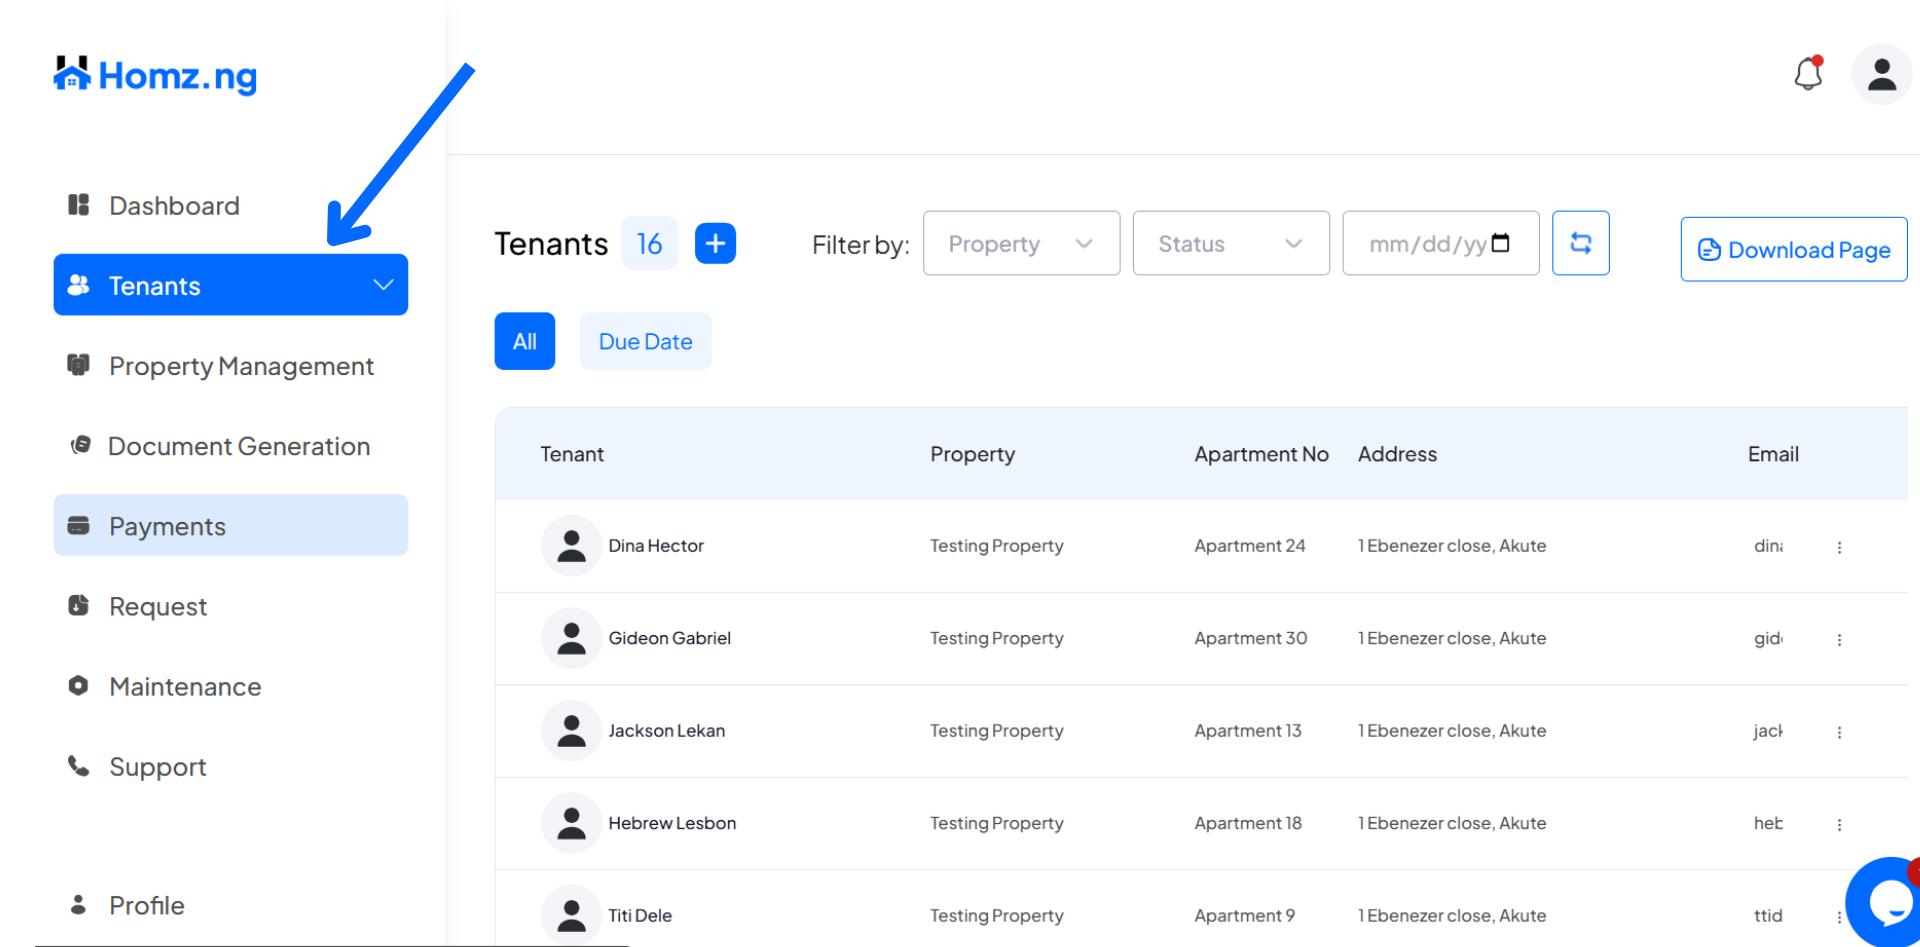
Congratulations, You have successfully imported a bulk tenants to your property manually .
Learn how to set rent reminder(s).
Learn how to add rent bank details.
Learn how to add and update an offline payment record for a tenant.
Learn how to add property documents.
Learn how to manually add a single tenant to your property.
Learn how to manage the maintenance requests from your tenants
Learn how to Invite tenants.
Learn how to accept or reject the tenant’s request to join your property.

